
Understanding proper piano finger positioning is essential for developing technique and interpreting music effectively. Each finger has a specific role‚ guided by a numbered system for consistency and clarity.
Importance of Proper Finger Placement for Beginners
Proper finger placement is crucial for beginners to establish a strong foundation in piano playing. It enhances dexterity‚ reduces fatigue‚ and allows for smooth transitions between notes. Correct finger placement ensures better hand posture‚ preventing potential injuries and improving overall technique. Additionally‚ it helps in developing muscle memory‚ which is vital for mastering complex pieces. Without proper finger placement‚ learners may struggle with accuracy and control‚ leading to frustration. Thus‚ prioritizing correct finger placement from the start is essential for long-term progress and enjoyment of playing the piano.

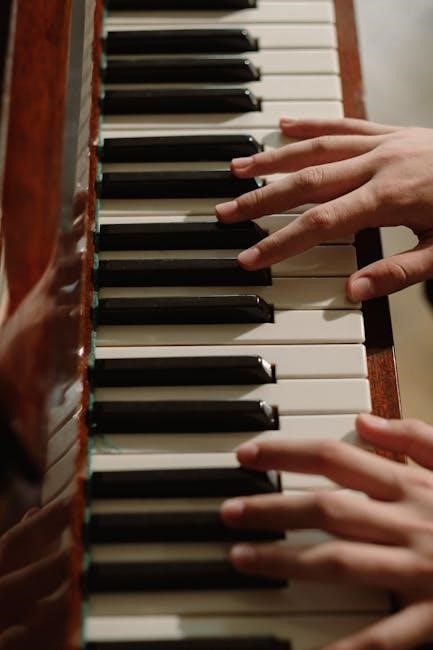
Understanding Hand Position and Posture
Proper hand position and posture involve keeping hands curved and wrists relaxed‚ allowing fingers to move freely and maintain control over the keyboard for efficient playing.
Correct Hand Alignment for Effective Finger Placement
Correct hand alignment is vital for efficient finger placement and technique. Keep your hands curved gently‚ with wrists relaxed and fingers arched over the keys. This posture ensures proper finger independence and strength. Align your hands so that your fingers naturally reach the keys without stretching or strain. The middle D key often serves as a reference point for centering your hands. Maintaining this alignment allows for precise finger placement‚ enabling better dexterity and control. Proper hand positioning also reduces fatigue and prevents potential injuries during practice.
Piano Finger Numbering System
The piano finger numbering system assigns numbers 1 to 5 to fingers‚ starting from the thumb to the pinky. This standardized system aids in sheet music interpretation and technique development.
Overview of Finger Numbers and Their Roles
The piano finger numbering system assigns each finger a specific role‚ numbered 1 to 5‚ starting with the thumb (1) and ending with the pinky (5). This system ensures clarity in sheet music and technique development. Finger 1 (thumb) often plays bass notes and octaves‚ while finger 2 (index) handles melodic lines. Finger 3 (middle) supports chordal playing‚ finger 4 (ring) adds depth‚ and finger 5 (pinky) extends reach. Consistent use of this system enhances dexterity‚ coordination‚ and musical expression‚ making it a cornerstone of proper piano technique.

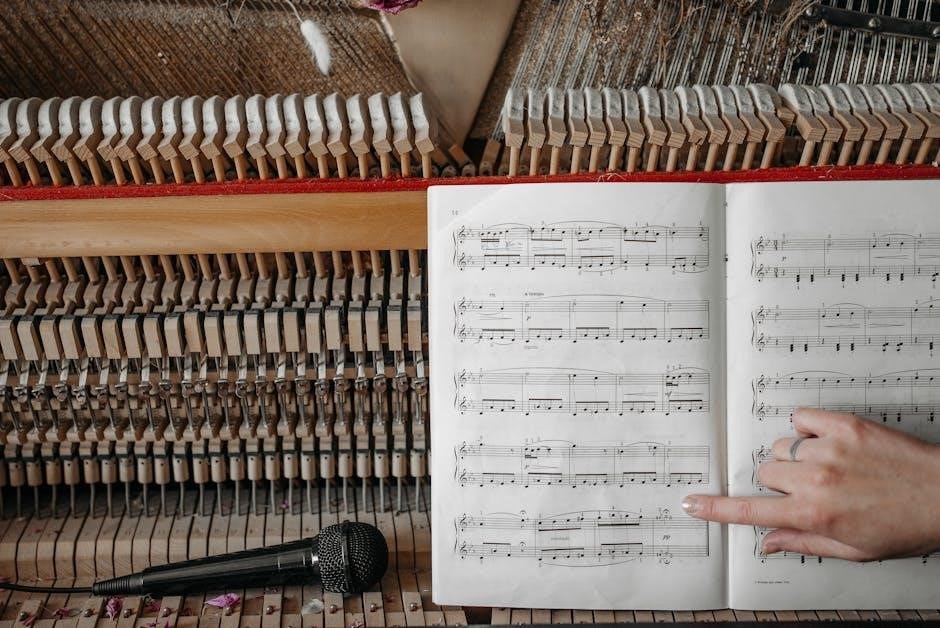
Understanding Piano Fingering Charts
Piano fingering charts are visual guides showing optimal finger placement for scales‚ arpeggios‚ and chord progressions. They help pianists maintain consistency and improve technique‚ ensuring smooth transitions between notes.
What Are Fingering Charts and How to Use Them
Fingering charts are detailed guides that map finger placement on piano keys for various exercises‚ scales‚ and arpeggios. They are essential tools for pianists‚ providing clear visual cues to ensure proper technique and fluid transitions between notes. By aligning with middle D‚ pianists can center their hand position physically and mentally. These charts are particularly useful for mastering major and minor scales‚ as they outline the optimal finger numbers for each note‚ helping to develop dexterity and consistency. Regular practice with these charts enhances overall performance and musical interpretation.
How to Read Finger Numbers on Sheet Music
Finger numbers on sheet music indicate which fingers to use for each note‚ with 1 representing the thumb and 5 the pinky. These numbers are typically placed above or below the staff‚ aligning with specific notes. By following these cues‚ pianists can maintain proper hand positioning and finger placement‚ ensuring smooth transitions between notes. Consistent use of finger numbers enhances dexterity and coordination‚ making complex passages easier to navigate. This system is especially crucial for scales and arpeggios‚ where finger placement must be precise for optimal performance.
Alignment Tips for Fingering Charts
Proper alignment with fingering charts is crucial for accurate finger placement. Center yourself physically and mentally around middle D‚ as this is a common reference point. Ensure your hands are positioned to align with the chart’s layout‚ which mirrors the piano keyboard. Place your thumb on C and pinky on G for a starting point. Keep your fingers curved and relaxed‚ allowing easy movement between keys. Align the chart’s finger numbers with the staff on sheet music to maintain consistency. This alignment ensures smooth transitions and proper technique‚ aiding in mastering scales and arpeggios effectively.

Major and Minor Scales Fingering
Mastering major and minor scales requires precise fingering techniques. Downloadable PDF charts provide detailed finger placements for each scale‚ enhancing practice and performance accuracy.
Understanding Major Scales and Their Fingerings
Mastering major scales begins with understanding proper finger placement. Each scale follows a specific fingering pattern‚ ensuring smooth transitions between notes. The C Major Scale‚ for example‚ uses fingers 1-2-3-1-2-3-4-5 for the right hand. Downloadable PDF guides provide visual aids‚ aligning finger numbers with key positions. These charts help pianists maintain consistency and improve dexterity. By practicing scales with correct fingering‚ musicians develop muscle memory and enhance performance accuracy. Proper finger placement also aligns with musical logic‚ allowing hands to move naturally across the keyboard. Regular practice with these resources ensures mastery of major scales and their fingerings.
Understanding Minor Scales and Their Fingerings
Minor scales‚ like major scales‚ require precise finger placement for smooth performance. Natural‚ harmonic‚ and melodic minor scales each have distinct fingering patterns. For example‚ the A minor scale uses fingers 1-2-3-4-1-2-3-4 in the right hand. Downloadable PDF guides provide visual alignment of finger numbers with key positions‚ aiding consistent practice. Proper finger placement aligns with musical logic‚ enabling natural hand movement. Regular practice with these resources helps master minor scales and their unique fingerings‚ building technique and interpretive skills effectively.
Fingering Charts for All Major and Minor Scales
Fingering charts provide visual guides for major and minor scales‚ showing finger placement and movement. These charts map each finger to specific keys‚ ensuring consistency and fluency. For major scales‚ patterns like 1-2-3-1-4-5 are common‚ while minor scales may use variations such as 1-2-3-4-1-2-3-4. Downloadable PDFs offer detailed diagrams for all keys‚ covering both hands. These resources simplify learning by aligning finger numbers with key positions‚ helping pianists master scales efficiently and develop proper technique.

Exercises for Improving Finger Placement
Engage in finger stretches‚ Hanon exercises‚ and scale drills to enhance dexterity and accuracy. These exercises strengthen finger independence and improve overall keyboard navigation and control.
4 Essential Exercises to Enhance Finger Dexterity
Mastering four key exercises can significantly improve finger dexterity. Start with finger stretches‚ which loosen and strengthen each finger individually. Next‚ practice Hanon exercises‚ renowned for developing finger independence and coordination. Incorporate chromatic scales to improve finger placement across the keyboard. Finally‚ perform arpeggios to enhance smooth transitions between notes. These exercises‚ when practiced regularly‚ build the foundation for advanced techniques and ensure precise finger control.
Logic Behind Finger Movement
The logic behind finger movement ensures efficient and musical execution. It follows the natural flow of the hand‚ using each finger optimally to maintain smooth transitions and avoid strain.
How Finger Placement Follows Musical Logic
Piano finger placement is deeply connected to the musical structure‚ ensuring smooth transitions between notes. Each finger is assigned based on the melody’s contour‚ harmonic progressions‚ and rhythmic demands. This logical approach minimizes hand movement‚ allowing for efficient playing. By aligning fingers with the music’s natural flow‚ pianists maintain clarity and precision. Finger substitution and alternation are used strategically to navigate complex passages seamlessly. This method not only enhances technical accuracy but also preserves musicality‚ preventing unnecessary strain. Proper finger placement is a cornerstone of expressive and effective piano performance.

Arpeggios and Broken Chords
Arpeggios and broken chords require smooth finger transitions‚ often using the thumb as a pivot for extended passages. Proper hand positioning ensures seamless execution and musicality.
Fingering Techniques for Smooth Arpeggios
Mastering arpeggios demands precise finger placement and fluid movement. Start with consistent hand positioning‚ using the thumb as a pivot for seamless transitions between notes. Practice scales to build finger strength and dexterity. For extended passages‚ focus on smooth finger substitutions and maintain a relaxed wrist. Proper fingerings‚ as outlined in piano finger position guides‚ ensure clarity and control. Regular practice with metronomes enhances rhythm and coordination‚ essential for executing intricate arpeggio patterns with confidence and musicality.
Common Mistakes in Finger Placement
Typical errors include improper finger stretching‚ ignoring finger numbers‚ and poor hand alignment. These mistakes hinder technique and lead to fatigue‚ necessitating mindful practice and correction.
Avoiding Typical Errors in Piano Fingering
Common mistakes in piano fingering include improper finger stretching‚ ignoring finger numbers‚ and poor hand alignment. These errors can hinder technique‚ cause fatigue‚ and make playing less fluid. To avoid these‚ practice mindful finger placement‚ follow fingering charts‚ and maintain proper hand posture. Regular exercises and scale practice help develop muscle memory and improve dexterity. Paying attention to finger numbers on sheet music ensures accurate and efficient playing. Consistent practice and attention to detail are key to mastering piano fingering and preventing typical errors.

Downloadable Piano Finger Position Guide
Access free‚ printable PDF resources offering detailed piano finger charts and guides. These downloads include scales‚ fingerings‚ and visual diagrams to aid practice and quick reference.
Free PDF Resources for Piano Finger Charts
Download free‚ printable PDF guides offering detailed piano finger charts for major and minor scales‚ arpeggios‚ and chord fingerings. These resources include visual diagrams and clear fingerings for each key‚ providing a comprehensive reference for practice. Whether you’re a beginner or intermediate player‚ these charts help master finger placement‚ improve dexterity‚ and enhance performance. Printable PDFs are available for all major and harmonic minor scales‚ ensuring easy access to essential fingerings. Use these guides to refine your technique and explore complex repertoire with confidence.

Advanced Techniques and Finger Positions
Explore extended techniques like harmonic minor scales and complex fingerings for intermediate players‚ refining your skills with precise finger placements for advanced repertoire.
Extended Techniques for Intermediate Players
Intermediate players can explore advanced techniques such as chromatic scales‚ complex arpeggios‚ and intricate fingerings. These methods demand precise finger independence and dexterity. Transitioning smoothly between scales and arpeggios is key‚ using the thumb as a pivot for octave extensions. Harmonic minor scales and melodic variations add depth to repertoire. Practicing these techniques enhances control and musicality‚ allowing for more expressive performances; Utilize downloadable PDF guides for detailed finger charts and practice routines to master these advanced skills effectively.
Mastery of piano finger placement requires patience‚ practice‚ and dedication. Consistent use of proper techniques ensures musicality and technical proficiency. Downloadable PDF guides provide invaluable support for refinement and mastery.
Final Tips for Mastering Piano Finger Placement
Consistent practice is key to mastering piano finger placement. Start with slow‚ deliberate movements to build accuracy and control. Use finger charts and guides to reinforce proper techniques. Focus on scales and arpeggios to develop muscle memory. Always maintain proper hand posture to avoid strain. Practice with a metronome to improve timing and dexterity. Regularly review and refine your fingering choices to ensure musicality. Downloadable PDF resources can provide structured exercises and visual aids for optimal progress. Stay patient and persistent‚ as mastery takes time and dedication.